My internet fiasco aside, I think it’s time I start getting back into some technical matters here on the blog. So welcome to the first in a series of posts about FPGA development!
Introduction
If, like me, you’ve always wanted to try your hand at programming an FPGA, there’s no time like the present. FPGA kits that are accessible to hobbyists have become affordable and plentiful! One of the most affordable is the BeMicro product line from Arrow and Altera, with kits starting at $30 and going all the way up to $149.
I recently bought the BeMicro CV package to play around with. The BeMicro CV is a nifty little $50 FPGA development board with an Altera Cyclone V FPGA, 128MB of on-board SDRAM, and 2MB of Flash memory. It’s also got a two push-buttons, three DIP-switches, and a MicroSD card slot available for your projects to use. I think it’s an ideal platform to get your feet wet in the world of FPGA development. But after you get your BeMicro CV out of the box, what do you do with it to get started?
The Tools
Altera FPGAs are programmed with the Quartus II suite of software. There are versions for both Windows and Linux available. For this Tutorial I’m using the Windows version because it felt like the path of least resistance.
If you’re used to developing software with an IDE, it’s not too dissimilar at first glance, but don’t be fooled! It’s more like an IDE on steroids. The Quartus II download is massive, weighing in at roughly 5.2GB for the full package. Given my current broadband woes, I visited a nearby coffee shop to download my while I sipped on a tasty beverage.
Downloading Quartus II
This is perhaps the most annoying step. I think it’s time for Altera to accept that hobbyists are using their tools, and make the process a lot easier.
The Quartus II Web Edition is totally free to download and use for your hobbyist projects, but in order to do so you’ll have to register with Altera and create a user profile, complete with a lot of information that really only applies to companies.
To download Quartus II, follow this link.
By default, you’re downloading the entire package with files for all sorts of different Altera devices. If you’re on a slow connection or you would like to save a little bit of disk space, you can choose to download only the files necessary for the BeMicro CV board by selecting the Individual Files tab, and under Devices, de-selecting everything except Cyclone V device support. (Remember, the BeMicro CV is a Cyclone V, so you need that!)
You’ll be prompted to register for an account when you try to download. I won’t walk you through this, it should be fairly self-explanatory. Use your best judgement here to decide what you need to enter when it comes to things like company name and company data.
When you’re done and logged in, go back to the download page and continue to download the software. It’ll take a while. Enjoy some quality time with coffee or tea.
Setting Up Quartus II
Once everything is downloaded, double-click on the installer and follow the instructions. I just used the defaults throughout the installation.
After Quartus II is installed, double-click the Quartus II icon to get started.

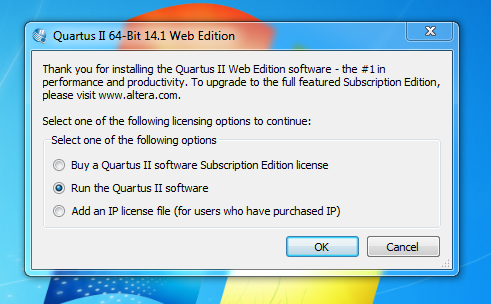
The first time you run Quartus II, you’ll have to click through a dialog box to let it know you want to run the software without buying a license:
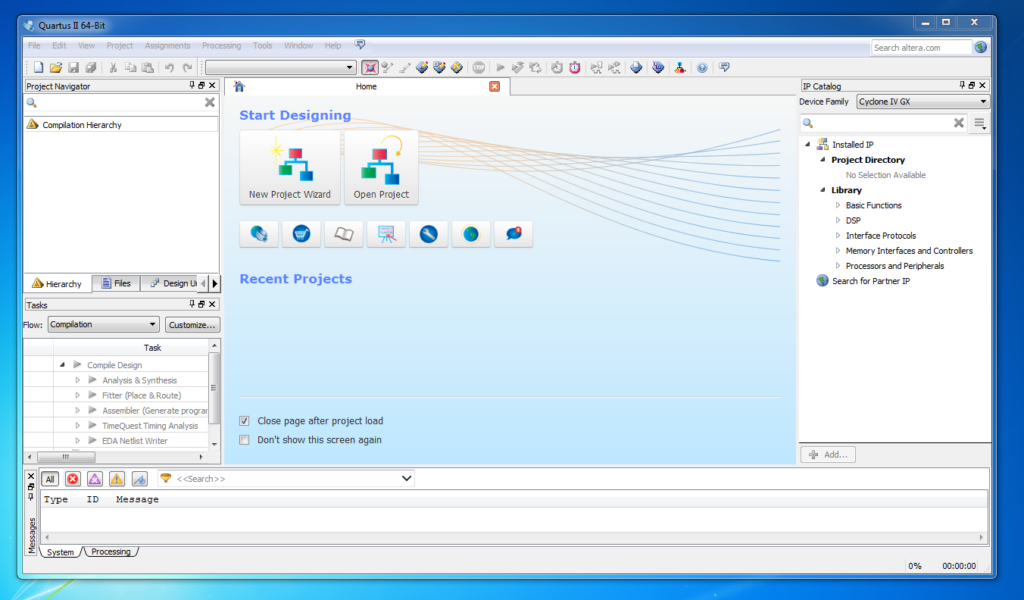
Finally, you should be greeted by something of a blank slate, ready to create a new project.
Your First Project
We’re going to walk through a very simple project. The goal of this exercise is to get the 8 user-programmable LEDs on the BeMicro CV counting down in binary from 11111111 to 00000000 forever, in an infinite loop. It should be fast enough to look cool, but slow enough for you to see it actually happening. I’m calling this project “Flashy”.
To get started, click on the New Project Wizard link in the middle of the IDE. This wizard will go through the steps of setting up our project.
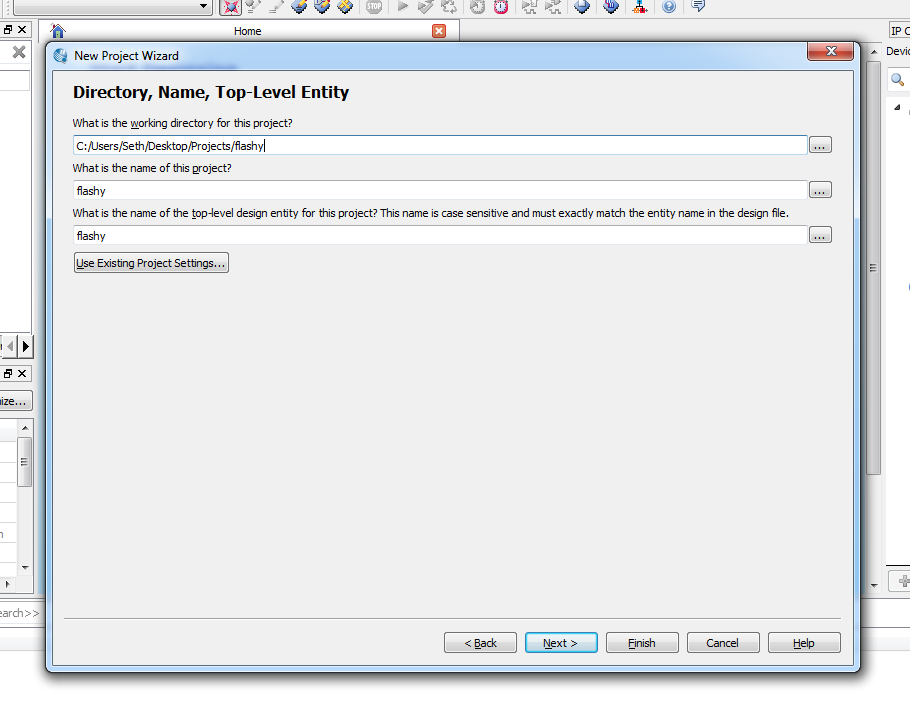
At the first dialog, enter a location and name for your project. I’ve
named my project flashy, and put it into a folder on my Desktop, under
C:\Users\Seth\Desktop\Projects\flashy. Then, click Next.
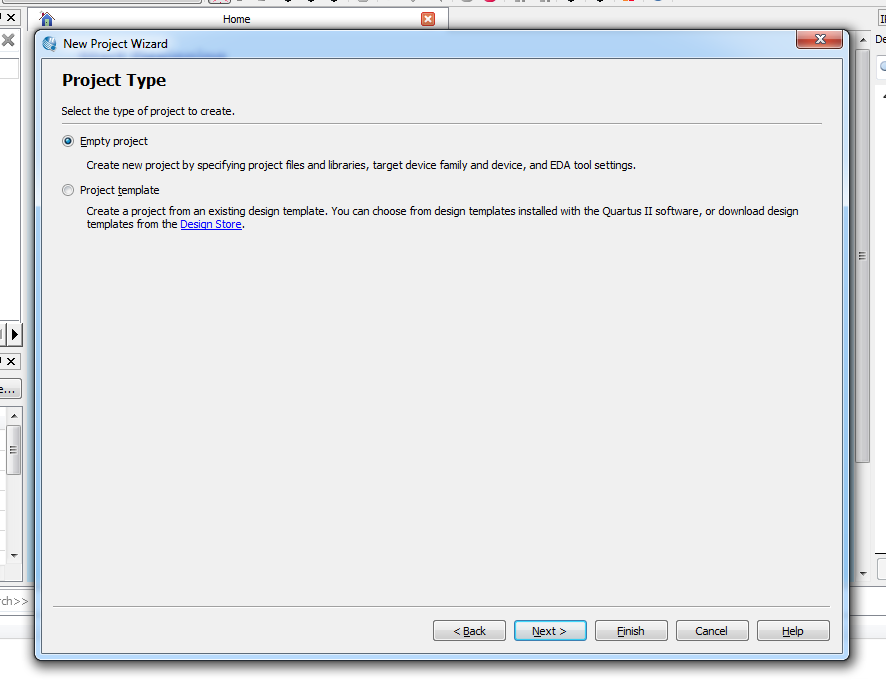
On the next dialog, click Empty Project, then click Next again.
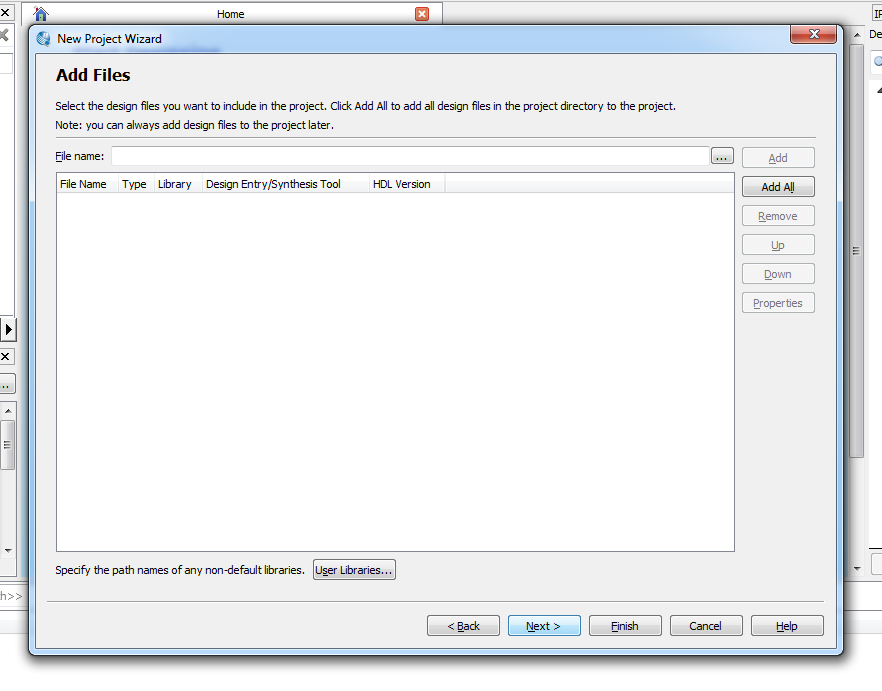
The next dialog asks if you’d like to add any files to the new project. We don’t, so just click Next.
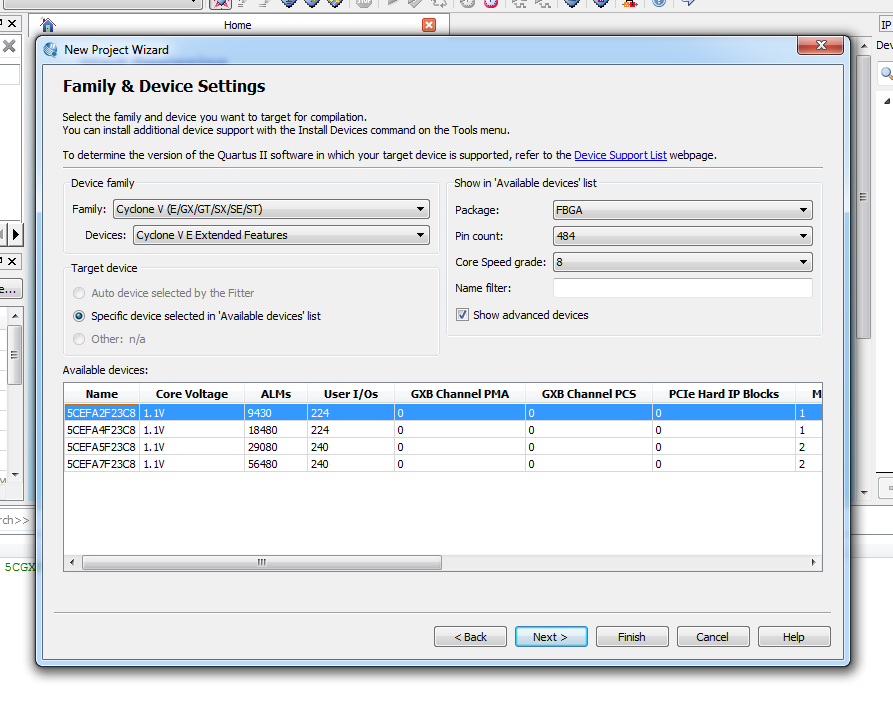
The next dialog is critical! It asks us to pick which device we’re going to target. To narrow down the choices, select the following from the pull-down menus:
- Family should be Cyclone V (E/GX/GT/SX/SE/ST)
- Devices should be Cyclone V E Extended Features
- Package should be FBGA
- Pin count should be 484
- Core Speed grade should be 8
- Finally, under Available Devices, select 5CEFA2F23C8
Be absolutely sure that 5CEFA2F23C8 is selected! This is the exact device used by the BeMicro CV, it must match the chosen device. Then click Next
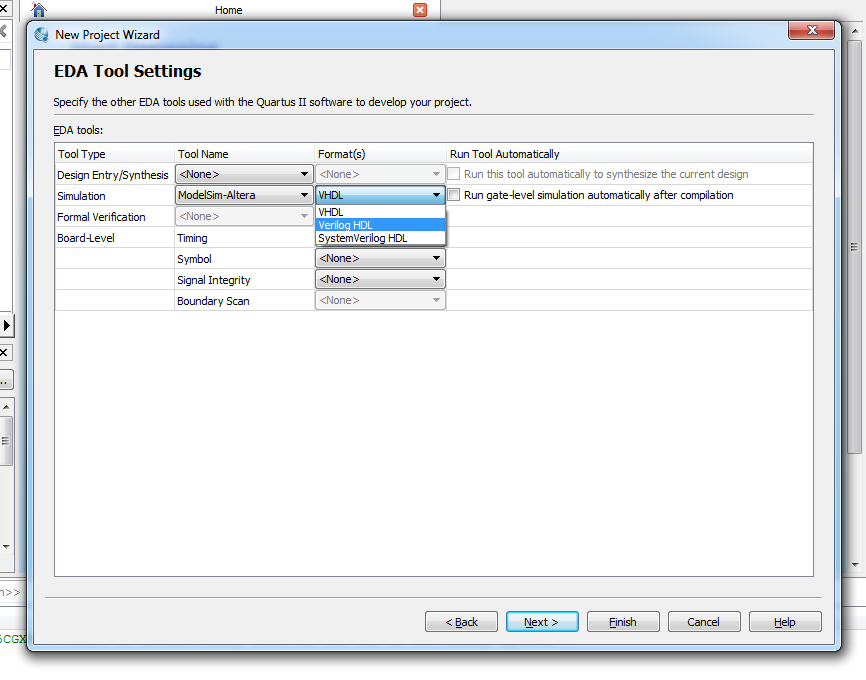
The next page in the Wizard is the EDA Tool Settings page. The only thing we need to change here is the Simulation Format. Pull down the menu and select Verilog HDL, then click Next.
The final page just asks you to verify everything. Make sure the Device is 5CEFA2F23C8, then click Finish.
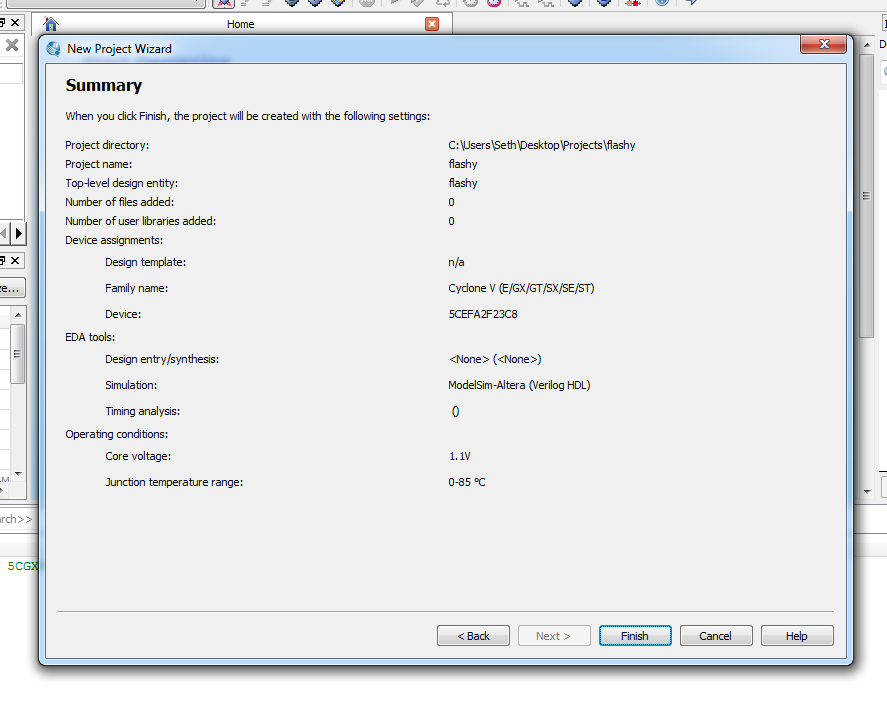
Congratulations, your shiny new blank project is set up and ready to start working on!
In our next entry, we’ll look at how to write your first Verilog module and compile it.
Comments